Sunday, September 27, 2015

Extra Pencil Organization Freebie

My post this week will be short and sweet as I've been very, very sick for many days.  Tomorrow I'm returning to work.  Wish me luck!  Luckily (or unluckily) my illness has fallen during an extra 2 days off for Eid.

If you live in the UAE like me, you might have seen these silverware containers.

They are everywhere and come in a variety of colors.  I stopped using mine in my kitchen (it gets pretty gross after awhile and who wants to put clean silverware in it after that?).  After staring at it empty on my counter for quite some time (like a year or two...) I finally got an idea to repurpose it.

Ta-da!  My new pencil thingamajiggy.  I'm using this one for my sharpened/needs sharpened pencil cups.  I love that they are connected together.  I've tried the separated cups in the past and they work but this is one less thing to worry about getting lost or when they don't get put back in the same spot. Of course I also thought of a few other things you could do with this container.  It makes a great sorting center - just switch out the sign and you have a completely different center with no extra things to purchase or store!  (Perfect since I don't have room for a ton of things).


I'm thinking I could also do some science sorts (day and night, weather) or some more math sorts (shapes), even letter sorts (stick/no stick).  I might have to go buy one more container though since I am using mine for the pencils.

Grab the freebie here to make your own.  Happy Monday!

 photo signature_zps316a3c30.png

Monday, August 17, 2015

Monday Made It!

Classroom Money

Life as a teacher abroad certainly comes with its fair share of challenges.  The one I've been facing for three years is teaching counting the local money without any sort of decent manipulatives.  These lessons always have me longing for my US plastic coins.  I have so many of those the kiddos can each have a small handful during practice time.  Needless to say (but I'll say it anyway) I am tired of using copied coins on paper and laminated for the students to use.  My plastic coin stash is out (and long lost in my US storage unit) since we can only teach local currency.

So what's a teacher to do?   I thought about photocopies and then modge-podging onto those glass gems.  I'm still tempted.  Maybe.  Here's what I did instead brought to you by 4th Grade Frolics.

Play Clay Money

I visited my local Hobby Lobby (well only local since I'm visiting my family in the US).  I used a small travel bottle of lotion for a clay roller.  You could actually use a clay roller (which I have but cannot find since my life is packed up still) or you could just find something smooth and round that you have on hand.  Same some $ for your money making.  ;)


I used Sculpey clay in silver.  Next you just need to take your clay and roll it out to your desired thickness. I made the coins pretty thin but I'm still testing it.  Too thick and you can't make very many coins.  Too thin and the coins may break.


 I would suggest cutting out around your coin "stamp" before stamping the opposite side so you have a double-sided coin.  You might also want to rub the coins with baby powder to help prevent it from sticking.  I didn't try that and it still worked out okay.


Unfortunately, the coin design is not very raised on these coins so it is a bit hard to see.  Especially the front of the dirham.  I'm cheating a bit here for my #Mondaymadeit since I didn't bake my coins and complete them but I'm in the middle of packing up 3 suitcases to head back to the Middle East day after tomorrow.  I will work on them some more when I'm back and settled.  

I plan on trying to add some black stamping ink (or rubbing a marker) to see if that defines the design more.  I will keep you posted!  It's also a good idea to practice with a different clay color (to avoid wasting the silver) if you are going to bake the test coins.  

Desk Name Tags

This is a product I made a few weeks ago but it is perfect for back to school.  If you have ELL students, this is great for them as well.  My favorite feature besides the super large printing area for the names is the red and green dots for encouraging proper reading direction and reinforcing concepts of print.  Best of all the alphabet pictures match my ABC posters to add less confusion when learning those letter sounds (I picked up that nifty tip from The Next Step to Guided Reading by Jan Richardson).


Arabic and English Bilingual Number Posters

I've been working on this one forever and it's about to go live (okay, okay I'm cheating a bit here since I'm still making them and it's not made technically).  I'm pretty excited about them and plan on making a less girly version for the male teachers out there.  Tone it down a bit from the pretty colors and glitter.  I'm also working hard on some bilingual number lines.  Both of these things *should* be finished by tomorrow evening because I'm flying out after that and won't be working for 2 days while I travel.
  

Freebie for TpT-ers and Bloggers Like Me

Since you hung in there with my cheating made its, I have a freebie for you. I wanted to make it a Facebook freebie but fangate just wouldn't cooperate and I don't have time to mess with it right now. Just click on the picture to download it directly from Google docs.  If you use it, send me some love!

Enjoy!

Special thanks to A Little Peace of Africa for the beautiful background and KG fonts to help make this little freebie.  Watermark as shown is not on the actual product.  :)
 photo signature_zps316a3c30.png

Saturday, August 15, 2015

A Tour of My Brand New School: Part 2

Teaching Abroad School Tour

Welcome back!  If you missed my school tour part 1 be sure to click here to check it out.  I have 2 more weeks before my back to school so it will be awhile before I can do a specific classroom tour.  I will be staying late to decorate the week before the kiddos come as we were already tour to expect no downtime and lots of PD that first week.  Yay.

First up on the tour is...

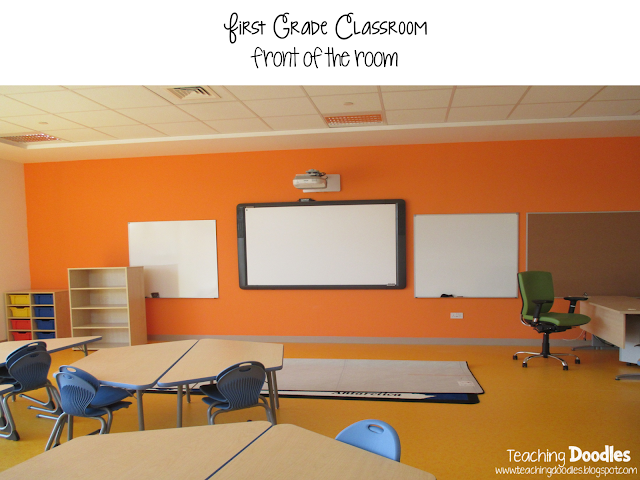
A First Grade Classroom


Almost all the classrooms are designed to be about the same size with the same setup.  All the rooms have windows, a few have more than others.  All classes are equipped with Promethean Boards which I haven't used before.  I have used Smartboard and Starboard so I don't feel too worried.

That's the teacher desk in the bottom right of the photo.  On the left corner out of sight is an easel and you can just make up the class meeting rug in the front of the room.  The IWB is in front of that which you'll see in the next picture.


As you might have noticed the room is not that big.  No matter which grade I will be teaching I will most likely be showing students how to take a center tub to their table.  There is not much room to create different areas.  One of these whiteboards will have to be taken over by mandatory objective posting and I'll probably add the daily class schedule as well.  You can check out my newly revised and editable schedule cards here.  Since the room already has a bright, bold color scheme I will stick to decorating it by using posters with a white or black background.


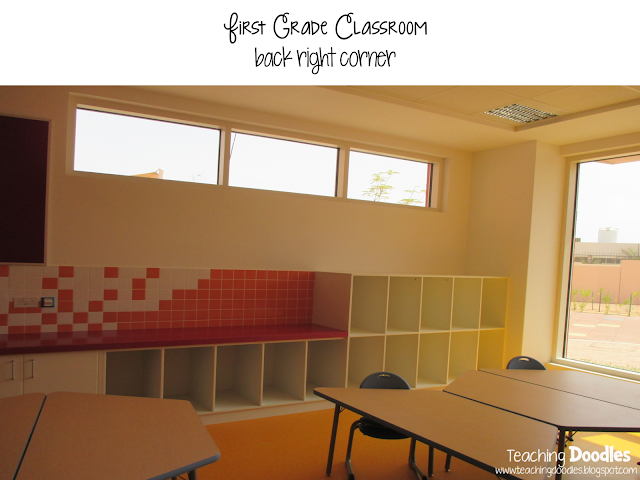
I plan on doubling up on these cubbies for students to have one to share.  Not only will they be sharing one with a student in their own class they will have to share with the next class as well so I can use some of them for storage.  Teaching grades 1-5 is run almost like teaching half-day kinder to two full classes. You can't really tell from the picture but these are pretty deep cubbies and I heard from another teacher that the students are not allowed to bring backpacks to school.  So really I shouldn't need all the cubbies for them, right??


Here are the remaining cubbies.  I figure one side I will keep for storage/center activity tubs and the other side will be for student use.  In between the cubbies is a sink which will be helpful for science and before snack/lunch.  Anyone have any good ideas to save lots of time when a whole class hand washes using one sink?  After 9 years  of teaching I have yet to have a bright idea (other than skip hand washing and use sanitizer).


A look at a few more rooms.  The only thing different is really the amount of cubbies, the size of the chairs, and the bookcases.

Each grade level section has a large common area in the middle of the classrooms, as seen above. I'm not sure what is currently planned for its use, but I'm thinking combined classes for fun science experiments, RTI, multi-class projects - the possibilities are endless!  It would also be a really cool place to put a reading area since the classroom itself doesn't really have room for big, comfy reading spots.  See those red, green, and yellow round things on top of some of the tables?  Those are floor cushions that would be perfect for this!

Here's just a look at some of the other common areas around the school.  They are pretty similar except for the colors.  I'm not sure about you but I think the orange is a bit much.

Believe it or not, some of our schools do not have playgrounds which was why I was quite excited to find this school has not one, but several.  I'm still trying to figure out the layout of the school (I've only been once) so I had a hard time telling how many but there are a few.  Even the nursery has it's own separate play area.

Teeter-totters and a swing set!


The top one in this picture is not a playground but a nice seating area for a teacher or two to take a break.  The bottom right is the nursery's area.  The windows are where the kindergarten section begins.

Here are just two examples of the teacher workspace areas.  Although there are desks in the classroom, many times (in my previous cycle 1 school) the specials area teacher will use your room to teach her lessons.  Which means during your prep time you do not have access to your computer or your room.  Luckily, the school offers these prep areas for you to grade papers or chit-chat. The only downside is these areas are tucked off of the grade level common areas and have no doors.  No doors = no privacy.  I don't remember seeing a space for teachers to eat.  Hmm...

So I'm really hoping I'm in kinder again this year.  Partly because I've spent almost all my teacher career in first but also because these rooms are cutest and coolest you've seen.  See through the window?  That's a private courtyard.  PRIVATE!  Your own personal mini play area.  Perfect to have a water/sand table AND a water wall (have you seen some of those on Pinterest?).  This room also has it's own bathroom.  Necessary for this age level!


Here's another look at the outside area.  That pink hippo is actually a trash can and is the same ones they have at the Al Ain Zoo.

Of course kindergarten also has its own shared area.  Unlike the other common areas this one has some play items.  I'm guessing they maybe eating lunch here instead of the cafeteria since there are quite a few trash can animals.  If you look at the first picture of the outside of the school, you'll see that the kindergarten has its own separate entrance but can be accessed from inside the school as well.

Well, that's the end of my tour.  I hope you enjoyed it.  I'm getting pretty excited to start a new year here.  It is such a colorful, cheerful place.

Are you ready to do a school tour with your kiddos?  Check out my latest product full of riddle fun for a scavenger hunt school tour!  It's on sale for a very short time.

 photo signature_zps316a3c30.png

Monday, August 10, 2015

Monday Made It!

Even though I am home visiting my family in the States and not really home in the UAE, I decided to try some Monday Made It's with my Dollar Tree finds I put on Instagram not too long ago (are you following me?  Well, why not?!).

Thanks to 4th Grade Frolics for hosting this fun and motivational linky so I can get some stuff done while on vacation.


In case you missed it, here's a small portion of my dollar bargains.  I'm using these for my made its.


 First up, I took my scissors and this:

Shape Sorting Mats

It created a super simple sorting center instead of keeping them as posters.  Now they are interactive, engaging, and best of all - hands-on!

Hands-On Activity for Sorting Shapes

Plus now I can use all those foam mats for all kinds of sorting mats or for quite dice spots.  Who doesn't love multipurpose things?


Building Number Sense with Easy to Make Number Puzzles

My original plan was to add the foam backing using one of the foam pieces in the Dollar Tree pack. They would have worked (sort of) but were just a smidge too small.  Instead I went to Hobby Lobby and picked up this 12 x 18 piece of foam at 88 cents and was able to cut it to size.  It left enough over to do two puzzles if I want. I think I have an ABC puzzle at home so I will be bringing it along in my suitcase.

You could always punch a little hole in the back of each number to get them out easier but I didn't think that was necessary.

The next 2 Made It's were all made with super simple materials (glue and Sharpies).  Here's what I picked to use:

Tacky Glue and Sharpies

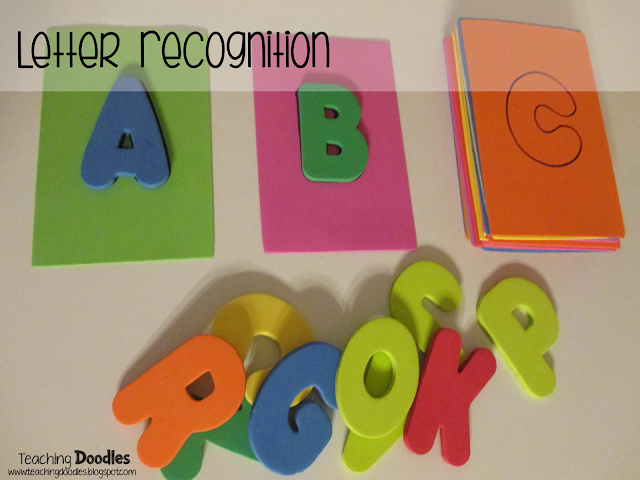
Next I found these fun foam bath letters (totally buried in the store).  I grabbed these small rectangles from the Dollar Tree craft aisle along with that tacky glue and my Sharpies.

Foam Letters and Mats for Simple Crafts

A short time later I had a fun matching alphabet letter center.

ABC Letter Recognition Game

Again I used a second bag of foam letters and small foam rectangles.

Add some glue, trace one of the letters and it turns into an easy alphabet letter order game!  Plus students are getting extra practice in learning the letter shapes to match them up.  Did I mention it's also self-correcting?  I suppose you could add a recording sheet as well but I'm imagining these for my early kinders who are not quite there with letter formation yet.

Emergent Readers ABC Order

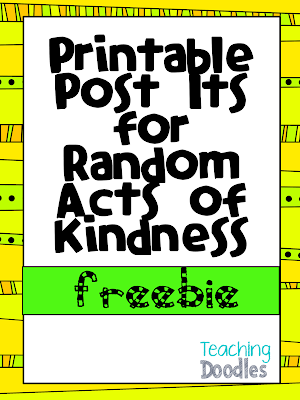
My last item is something I whipped up quickly this morning before finishing this blog post.  I know many of you have started back to school (so sorry!).  That first week is tough and hectic, there's a bazillion things to get done and maybe you'll forget to leave a little love note for your co-workers.  If you follow Farley, she talked about doing Random Acts of Kindness throughout the year.  I decided the easiest way for us busy bees just back into the thick of things would be to print some quick sayings on Post-Its and then leave the note with a small token in mailboxes.  In my case, it will be on teachers' desks - no mailboxes at my school.  Anyway, it could be a small piece of chocolate, a new pen, etc.

Thanks for sticking around to read my post - click the picture below to grab your freebie.

Printable Sticky Notes for Random Acts of Kindness

A special thanks to the linky host for this fun linky that helped me get a few things off my to do list. Be sure to click below to see what other fun made its you can find this Monday.
Fourth Grade Frolics  


 photo signature_zps316a3c30.png
Related Posts Plugin for WordPress, Blogger...